Electronic Brailler LLC
1901 N. French Rd
Buffalo, NY 14068
Phone 201-665-9219
Duxbury DBT and BERT software can be licensed from Electronic Brailler LLC
No part of this publication may be reproduced, stored in a retrieval system, or transmitted in any form, without the express written permission of E-Brailler. Every precaution has been taken in the preparation of this manual to ensure the completeness and accuracy of the information it contains. Even so, E-Brailler assumes no responsibility for such errors or omissions that may occur. Neither do we assume any liability for damages resulting from the use of information contained herein.
Brand names, company names, or product names mentioned in this document may be trademarks, registered trademarks, or service marks of their respective companies.
Electronic Brailler has five patents pending.
| Introduction | Page 4 |
| Glossary | Page 5 |
| Section 1: Setting up the Cosmo | Page 6 |
| Unpacking Your Cosmo | Page 6 |
| Power Up Cosmo | Page 6 |
| Loading Paper | Page 6 |
| Connecting to a Computer | Page 6 |
| Keyboard Guide for Cosmo | Page 7 |
| Section 2: Stand Alone Cosmo | Page 8 |
| Section 3: Cosmo with Duxbury DBT | Page 9 |
| Section 4: Cosmo and BERT | Page 11 |
| Section 5: Some Notes on Remote Education | Page 12 |
The Cosmo Electronic Brailler is a new concept intended to teach blind children Braille, and to teach subjects through braille. A young child can learn braille on the Cosmo with an aide sitting two feet away. A young adult can learn calculus on the Cosmo from a teacher located two thousand miles away.
Cosmo can be used three ways:
| BERT | Braille Education Remote Tool |
| Braille keyboard | Keyboard similar to the keyboard on the Perkins Braillewriter |
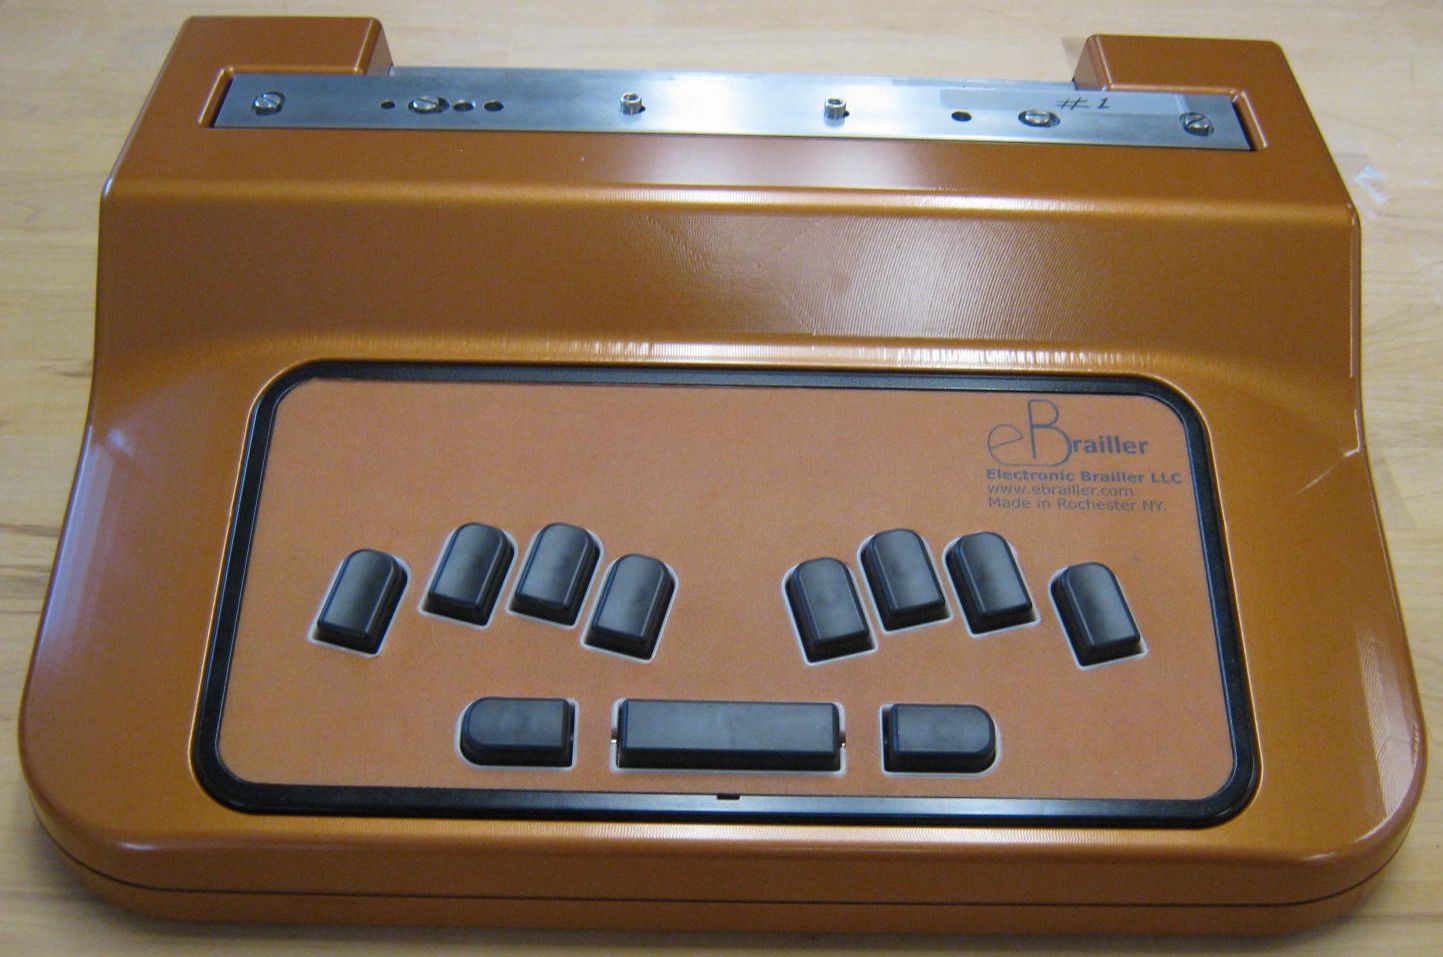
| Cosmo | The Electronic Brailler hardware |
| Default | What you get if you don't change anything. |
| Emboss Head | Mechanical element that makes the Braille dots. |
| Interface | Connection. |
| Press | The term used to describe pressing one or more keys together on the Cosmo keyboard |
| USB Port | Universal Serial Bus - Connects the embosser to a computer with this high speed connection. |
{Insert un-packing instructions here}
The USB connection and Power connection are to the rear of Cosmo. The Power unit is a standard 12 Volt universal power connector. Just plug the power adapter in to the wall outlet and connect the barrel connector in to the receptacle at the rear of Cosmo. The on/off switch is on the left side of Cosmo about three inches from the front edge. When Cosmo is turned on, you will hear Cosmo cycle up and then a series of audible beeps.
Cosmo is ready to work. If you have the optional Battery pack and charger for the Battery these options work separately from the universal power supply that comes with Cosmo. The Battery simply plugs in to the rear of Cosmo using the same size of barrel connector as the power adapter uses and the battery is inserted in the same connection port where the power adapter would normally be connected. The battery is charged with a smart charging unit.
Paper is loaded from the rear of Cosmo. Make sure Cosmo is turned on for loading paper.
Facing the Braille writer from the front; push the paper in to the slot at the rear bottom of Cosmo aligning the left side of the paper with the left side of the paper slot. Push the paper until it reaches the rollers inside of Cosmo. The paper will stop. Press the Alt and Ctrl keys at the same time, (Alt is to the left of the spacebar the Ctrl is to the right of spacebar). The paper will feed to the emboss position in Cosmo.
When embossing more than one page Cosmo stops embossing at the end of the page and will continue on the next page after a new piece of paper is loaded. Cosmo will repeat the process one page at a time until the Braille Document is complete. When Cosmo stops embossing at the end of the document, press the Ctrl and Alt function keys on the Cosmo keyboard to eject the last page.
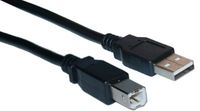 A standard USB cable connects the Cosmo to a Computer. The USB cable connects at the rear of the Cosmo.
To get DBT to work with the Cosmo, you need to install software drivers. Here is the correct sequence:
A standard USB cable connects the Cosmo to a Computer. The USB cable connects at the rear of the Cosmo.
To get DBT to work with the Cosmo, you need to install software drivers. Here is the correct sequence:
c:\Program Files (x86)\Duxbury\DBT 12.7\DBT 12.7\Drivers\Cosmo.
Run CosmoBrailler.exe. Follow prompts to complete driver installation.Version Note: The Cosmo requires DBT 11.2.
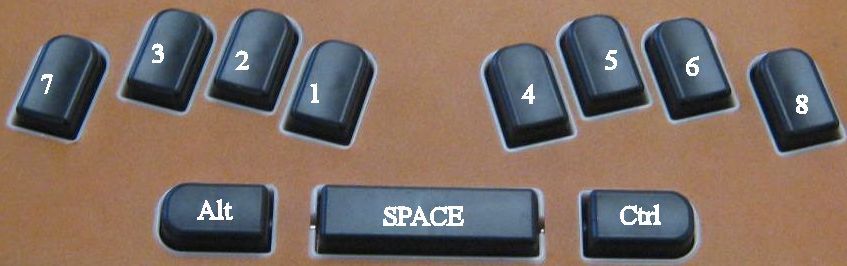
The Cosmo Keyboard has 8 Braille keys and a spacebar. It also has an Alt key and a Control key.
The key to the left of the spacebar is Alt and to the right of the spacebar is Ctrl
Braille Key 7 is far left and Braille Key 8 is far right.
When off line, or not connected to a personal computer, Cosmo works as a standard Braille writer.
In this table Press S-45 means press the spacebar at the same time as you press dots 4 and 5. Press CA means press Ctrl and Alt at the same time.
| Press 8 | Carriage Return (and Line Feed) |
| Press 7 | Back Space |
| Press S-7 | Backspace and Erase |
| Press S-8 | Read Key (canceled with any key press) |
| Press S-123456 | Escape - to main menu |
| Press S-1 | Cursor arrow up |
| Press S-4 | Cursor arrow down |
| Press S-3 | Cursor 1 character back |
| Press S-6 | Cursor 1 character forward |
| Press 78 | reset the embossing head home function |
| Press 78 | Chord test |
| Press CA | Load Paper or Form Feed |
The read Keys brings the document up four lines so that you the user can read the document or last line of the document to view the last character typed. When the user is ready to continue typing press any key on the keyboard and the paper will move back to the exact place where it was before the read was pressed. Then after the paper is in place continue with the next desired character.
When typing a character, after the last selected character is embossed, the emboss mechanism moves to the next space on the paper ready for the next selected Braille character to be embossed. When back space is selected It moves the emboss mechanism back one character space and it is ready for the next command. Each time back space is selected the emboss mechanism moves only one space so if you need to remove a character or add a character three places from the last character typed you must press back space three times.
When the backspace and erase function is used the emboss mechanism moves back one character to the previous character and presses the Braille character flat. So for example if you need to erase or press flat the fourth character from the last character press back space three times then press back space and erase one time. After the character is pressed by the emboss mechanism the carriage moves one space right so if you want to replace the erased character press back space again and type the new character. Press the proper number of spaces to bring the emboss mechanism to the proper place in the line to continue typing your document.
Version Note: The Cosmo requires DBT 11.2.
There are two ways that the Cosmo works with DBT:
When Cosmo is connected to a PC running Duxbury DBT, almost all Duxbury commands can be entered from the Cosmo keyboard. There are a number of reasons to do this. A young student may not have mastered the computer keyboard. Such a student can be taught to do simple tasks on DBT that help prepare braille material for sighted teachers.
Some students may prefer to write in braille, and to give commands to DBT with the same keyboard, even if they are proficient with the computer keybpard.
Chart of Cosmo keyboard controls.
** means that it is not possible to combine this with Ctrl or Alt. NI means Not Implemented in DBT as of the writing of this document.
| Press 7 | left arrow, backspace without erasing; works the same as Press S3 |
| Press 8 | return |
| Press S3 | like a left arrow. |
| Press S-6 | right arrow. ** |
| Press S-1 | up arrow. ** |
| Press S-4 | down arrow. ** |
| Press S-45 | tab |
| Press S-12 | shift tab |
| Press S-7 | backspace and erase. ** |
| Press S-2 | "previous word" [NI] |
| Press S-5 | "next word" [NI] |
| Press S-23 | "previous paragraph" [NI] |
| Press S-56 | "next paragraph" [NI] |
| Press S-123456 | Escape; ** |
Ctrl plus any six-dot combination that corresponds to an English braille letter will invoke a menu shortcut that corresponds to it, provided that there is such a shortcut, that the menu item is enabled, and that there is not a dialog box. When the letter key does not correspond to a menu shortcut, but does have a document editing function, it should work as intended (assuming only that a document window and not a dialog box is in focus.)
When entering Braille from the Cosmo Braille keyboard as a new document:
In the opened screen, text mode, grade 1 Braille typed from Cosmo’s keyboard will show as basic text characters. Basic Grade one characters will appear as text or Braille. Select the View pull down menu and select Braille font the characters will appear as Braille if six key entry is selected. Contracted braille has to be input using the Translated Braille document feature. To accomplish this, while in a blank text document press spacebar one time then select Translate either from the file pull down menu or press the Ctrl and T key at the same time. This will put you into the translated Braille document screen. This will then allow Braille input to the Duxbury Braille Translated document.
As Braille is typed from The Braille Writer keyboard the keys depressed will appear as Braille Characters on the computer screen. If the user, teacher aid, or parent would rather read the Braille input as text as the student types they can select the View option at the top of the screen. The View Pull Down Menu and select Translated Line from the list. There will then be a yellow colored line at the bottom of the Braille document screen. This translate line shows the back translated Braille characters as text. In this way a teacher aid can assist their student while he or she is composing a document.
A braille file in DBT can be translated into inkprint, and then printed out. A student can write in braille, have a hard copy, while being supervised by a sighted aide. The completed braille can be translated into inkprint and then printed, or converted to a Word file.
Refer to the Duxbury DBT manual for more of the functions and capabilities of Duxbury DBT. Press Control-T to translate from braille to print. See this page for how to convert a DBT file into a Microsoft Word file.
When setting the Hardware requirements with the Duxbury application:
Once the document is made and translated to Braille, either select Emboss from the file pull down menu or press C-15 keys at the same time. If you are in the proper Braille screen a file emboss selection will appear. Press the enter key from the computer and the document will be embossed on paper by the Cosmo Brailler.
Your school or organization will give you the URL for downloading BERT. They will also provide you with the log in credentials.
Once you launch BERT, make sure you get the focus on the log in screen before you start typing in the User Name and the Password.
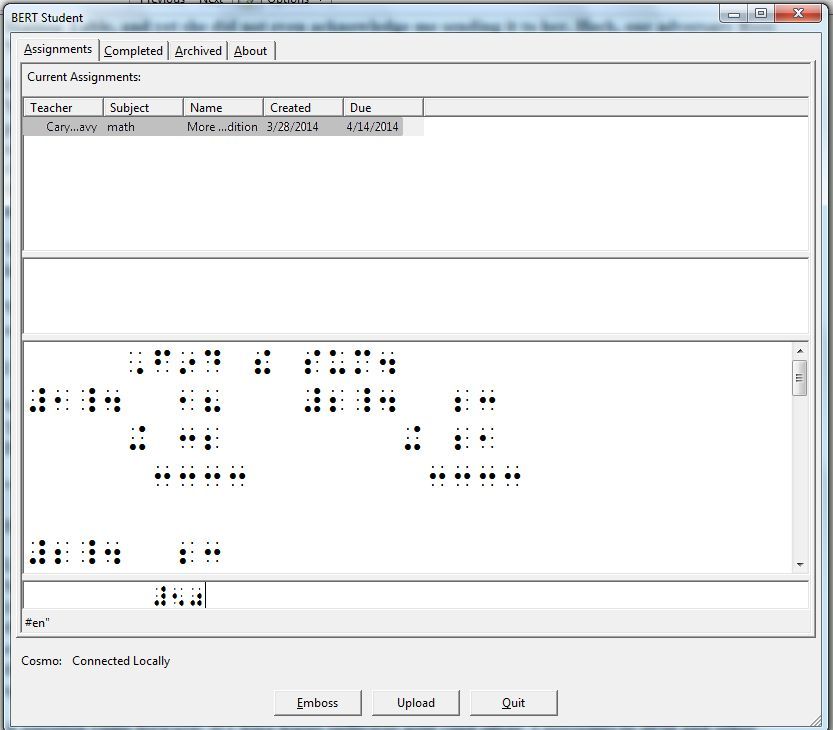
The Top third of the BERT Student Screen is focused on Assignments (Homework). There are three tabs related to Assignments: (Current), Completed, and Archived. Usually, a student needs to look at Current Assignments (that is the default).
Each Assignment has its own line. The display shows the Teacher, the Subject, the Name, Created Date, and Date Due. By clicking on an assignment, the memo field and the braille contents are displayed on the screen. If the student wants he/she can click on the Emboss Button to have the assignment embossed on the Cosmo.
The expectation is that the student will respond (answer) the assignment on the Cosmo. As the student uses the Cosmo, the braille also show up on the BERT screen. By clicking on the Upload button on BERT, the response is sent directly to the teacher.
Under the teacher's direction, the student and the teacher can send braille back and forth, to help clarify something for the student.
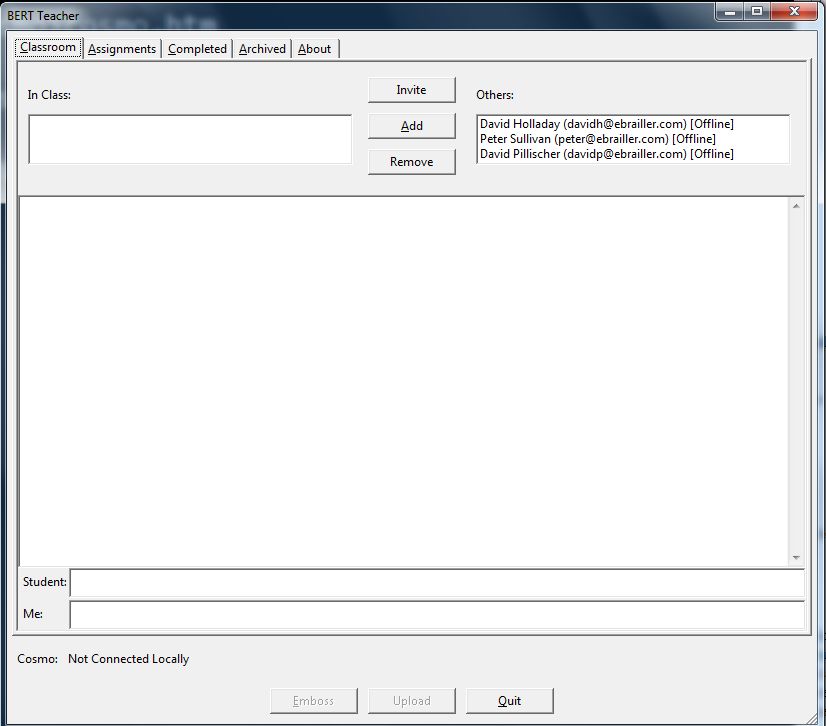
The BERT Screen for teachers allows for focus on assignments or classroom interaction. An assignment is a braille ready file (brf file). A brf file can be produced in a text editor by a braille-knowledgable teacher, or created with a braille production program (such as Duxbury DBT). When creating an assignment, it is important to select a student. Without a student selected, the OK button to actually assign the assignment to a student is greyed out. If you find that the OK button is greyed out, do make sure you have highlighted a student's name.
The BERT Screen for teachers allows the teacher to know which of his/her students are on-line, and allows the teacher to invite one or more students to a class session. A teacher can make an assignment, grade assignments, and stop or start a session.
In the United States and Canada, during the mid 1980’s and 1990’s when the voice synthesizer was developed to be used with a computer and text to speech software applications also came into development, many agencies and schools responsible for the education of blind children decided Braille was dead. For a period of approximately ten years Braille was not taught to blind children as it had been in years prior. Braille books were expensive and difficult to obtain, the requirements for teachers who specialized in education of blind students were relaxed. Most education degree programs no longer required educators for the blind to learn Braille. The result was a generation of blind people who did not read Braille. It has been researched and proven; blind adults are more successful when they know Braille. Seventy percent of blind adults are currently unemployed. Of the 30% who are employed 97% are Braille users. This fact has been researched by the National Federation of the Blind, The American Council of the Blind, The Department of Education as well as the Library of Congress.
Using BERT hardware and software, teachers trained to use Braille can monitor a student’s work over the internet offering a real time side by side learning experience for both teacher and student. Most blind students are mainstreamed in to local schools near their homes where sighted students also attend classes. In many countries, teachers who specialize in teaching the blind students travel from home or the government agency where their office is located to remote schools where their students attend. The itinerant Braille teachers can now travel less and therefore be able to concentrate more of their time on individual students who are having difficulty learning. This will also make it possible for fewer teachers to work with a larger number of students. Government agencies responsible for teaching blind students would better utilize scarce funds currently being used for fuel and maintenance for their vehicles rather than direct educational deliverables.
In areas where trained teachers teach Braille to children are not available or few in number, organizations or various agencies that teach Braille would be able to offer remote education for these students. Many times a parent or teacher assistant would be able to be trained well enough about the BERT application and Braille writer to assist the remote educator.