Simple Braille Graphics
An option within DBT's Word importer allows you to treat the Braille and Simbraille fonts as exact braille, and therefore import them in to DBT without translation.
However until the release of DBT 11.2 SR4 if more than a single space appeared between characters in these two fonts, they were removed. Now they are retained, and the Simbraille font can now visibly display the spaces in Word when Word's Show/Hide is on.
Here is a screen shot from a Word file which includes a graphic as well as a Simbraille rendering of that graphic which must have its alignment faithfully re-produced in braille.
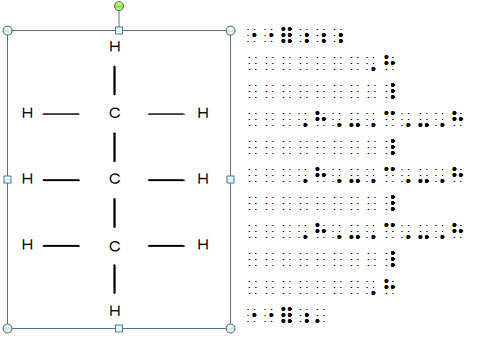
When this file is opened in DBT, the image shown on the left is, as usual, omitted. However the braille shown on the right will move to the left in DBT and be translated and formatted exactly as shown.
Your next question will doubtless be, "How do I input the braille characters in Word?" For the list that shows which keyboard character generates which dot pattern when the Braille or Simbraille font is used, see Embosser Character Table. This list is presented in braille dot number sequence.
Tips For Designing a Simple Braille Graphic
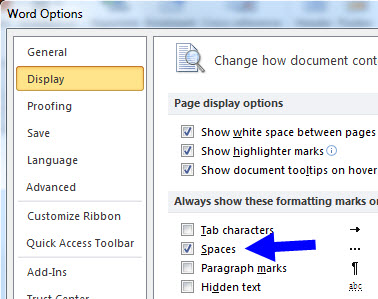
First you need to make spaces visible. Go to Word's Options: Display: Spaces, and check this option to show spaces. (You can turn it off again when finished with your graphic.)
Now create a new document with equal length lines of spaces representing where dots can appear. You must use a New Line (Shift+Enter) for each new line. This set of lines provides a 2-dimensional "drawing" space to use in the next step.
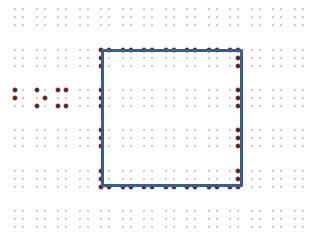
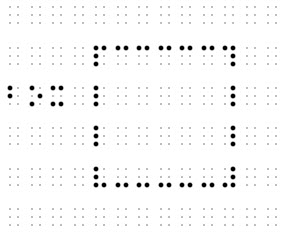
The following illustration shows a simple box shape. To assist we have used Word's Insert: Shape feature and placed a box over the spaces where the graphic must appear. The aim is to align the square with as many braille dots as possible.
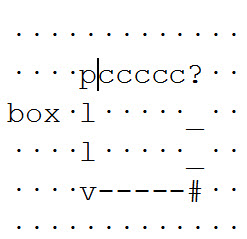
The left image shows the print box adjusted to align with as many dots as possible, and the right image shows the characters used to produce the braille patterns required for the desired shape. Further below is an illustration of what it looks like after removing the print box.
Obviously this is a simple example, but as many already know, this technique can achieve remarkable results.